EASTBOURNE REMEMBERED
009 model of Eastbourne Electric Tramway
Click on the small pictures for a larger version
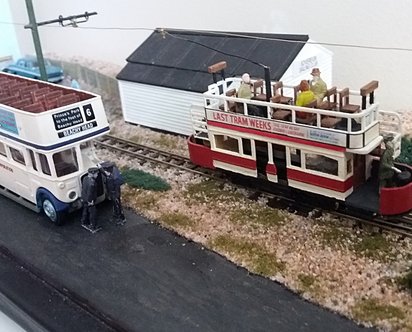


Having a life long interest in trams and miniature railways the miniature tramway at Eastbourne was a marriage made in heaven for me. I first visited in the late 50s and following that I dropped in whenever I was in the area. If one is allowed a favourite mine was Car 2 with its Robinson type stairs and I always wanted to model it, but I didn't get the chance until 2015.
I purchased my first 3D printer and taught myself to use one of the simplest of CAD programmes (SketchUp Free). Armed with this I decided to have a go at printing a tram body. Having realised the limitations of the printer I decided to build the car as you would an Airfix kit, that is flat pack and assembled with glue. After a few experiments I decided it was time to attempt an Eastbourne tram.


The baseboard had a road surface along the front edge and then the rest of it was either flat or undulating shingle. There were only two buildings and both were 3D printed. The first was the small waiting shelter, which is slightly shorter than the prototype as I left off the shop extension, and the other was The Sovereign Sailing Club headquarters. The latter was originally named the Artisans Sailing Club but by the time my model would represent it had already gone for the much more suitable title. The sailing club also housed the small section box, which is why there is no roof at the back.
First it was Car 6, then 2, the 7 and then 4 - but I didn't have anywhere to run them, but I did have a redundant B&Q pine shelf. I reasoned I could build a fair representation of the Princes Gate terminus running in to a 3 road sector plate. I think these three pictures give a fair idea of the layout.


Up to this point I hadn't given much thought to the elephant in the room - the overhead. I'd decided to have it as a two rail pick-up and each tram (except no.4) was fitted with a KATO 103 4w mech. The trams had a thin brass tube glued into the top deck, into which a suitably bent piece of sprung wire was inserted. At the end of the wire was a nut with a filed down bolt head acting as a trolley wheel. It was remarkably crude but it dod work. I'd never done any overhead before but I had a go at not only the single overhead wire from the sector plate to the tram station throat, but a left hand overhead frog and a crossover as well.
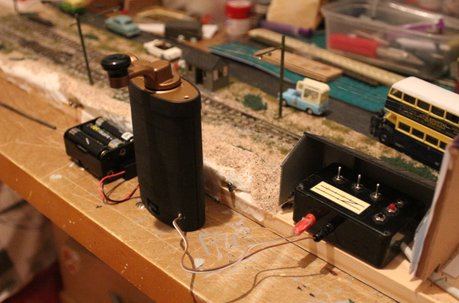
I wanted the layout to be as portable as possible so I decided to run it off batteries. You can see the 9v 'power station' to the left of the controller. The tram type controller was a cut down Tomytec controller into which I fitted one of the cheap 9v pcm controllers available on ebay. The switch box controls the sections and as prviously mentioned was built in to the sailing club building.
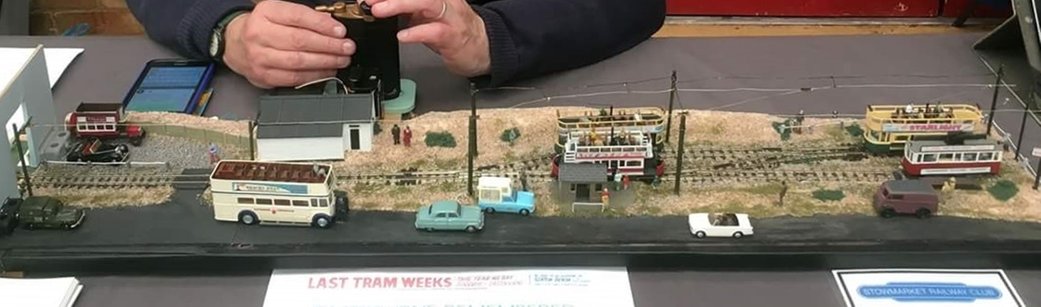
The completed model stands on its carry case at a local exhibition, waiting for it to open. The vehicles and people give some idea of scale against the narrow gauge trams
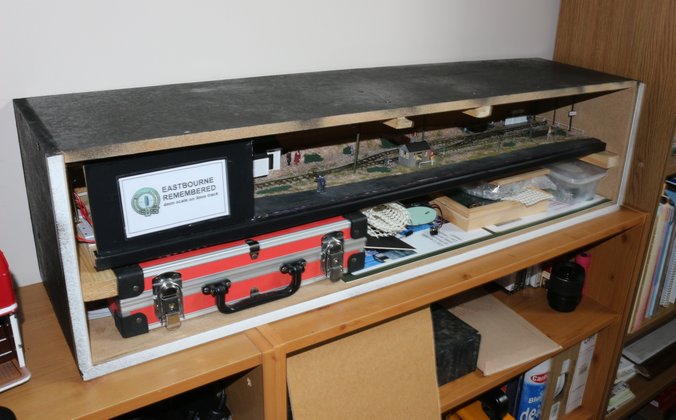
The layout packed down nicely into a single carrying case I could put under my arm. The trams are all in the red case with the controller and other bits alongside.
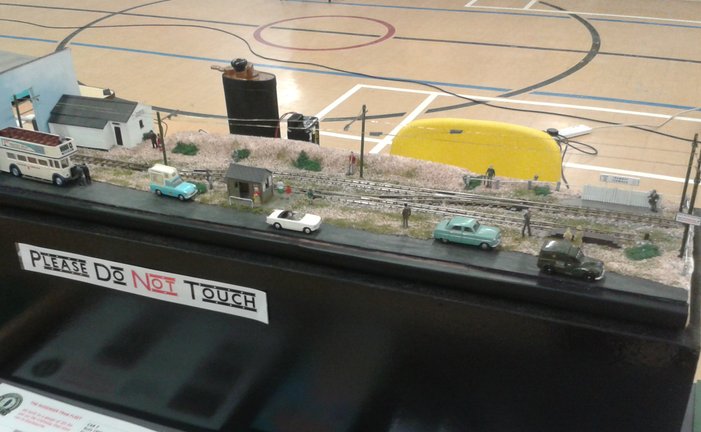
The one thing that was missing was a slightly longer run for the trams so I decided on a short extension. This involved removing the sector plate and adding a short fiddle yard. This gave about another 9" run, which may not seem much but was enough to give a couple more scenice features.
The extended layout showing the car park alongside the sailing club and the crossing over the tramway. It's a bit of a busy day with Car 2 about to leave for the Crumbles while in the arrival platform pasengers are alighting in readiness for the tram to move to the loading platform alongside the shelter. The tram shop is quiet as is the ice cream van. In the sailing club car park the miniature B Type bus built by the tramway company as a publicity vehicle waits for its next excursion perhaps to the town carnival.